
Life, you know. Summer break, non-stop baseball every single night. Busy, busy, busy.
But I have a couple of minutes today, so here goes another page makeover!
First, the original page:

Yep, you see it too, don't you? No journaling.
So I scanned this page and pulled up the Design R Template in the Project Life app. Two of my photos fit pretty well within the large pockets, but because of how I had originally cropped the photo of my wife and son, it was too all and narrow and wouldn't reduce down to fit nicely into a single pocket. So I enlarged that photo and put it in the two pockets on the left.

Doing this takes a little bit of finesse, since you are pinching and dragging to enlarge the top photo to begin with, and then you have to pinch and drag the EXACT SAME amount to get the bottom part of the photo to line up! It would be so great if there was some sort of percentage or number you could reference after you get the top photo just right (like if when you were done it would say "this photo was enlarged 216%") then you could just enlarge the bottom the same percentage! But no, it's a manual process for sure.
Just look for things you can line up between the two photos. In this case, I tried to use the design on my wife's pants and my son's shirt sleeves to get it just right.
When it came to the filler cards down the middle, I knew there was a roller skate in the Awesome Edition card set. So I found the one I wanted, and put it in the middle square.
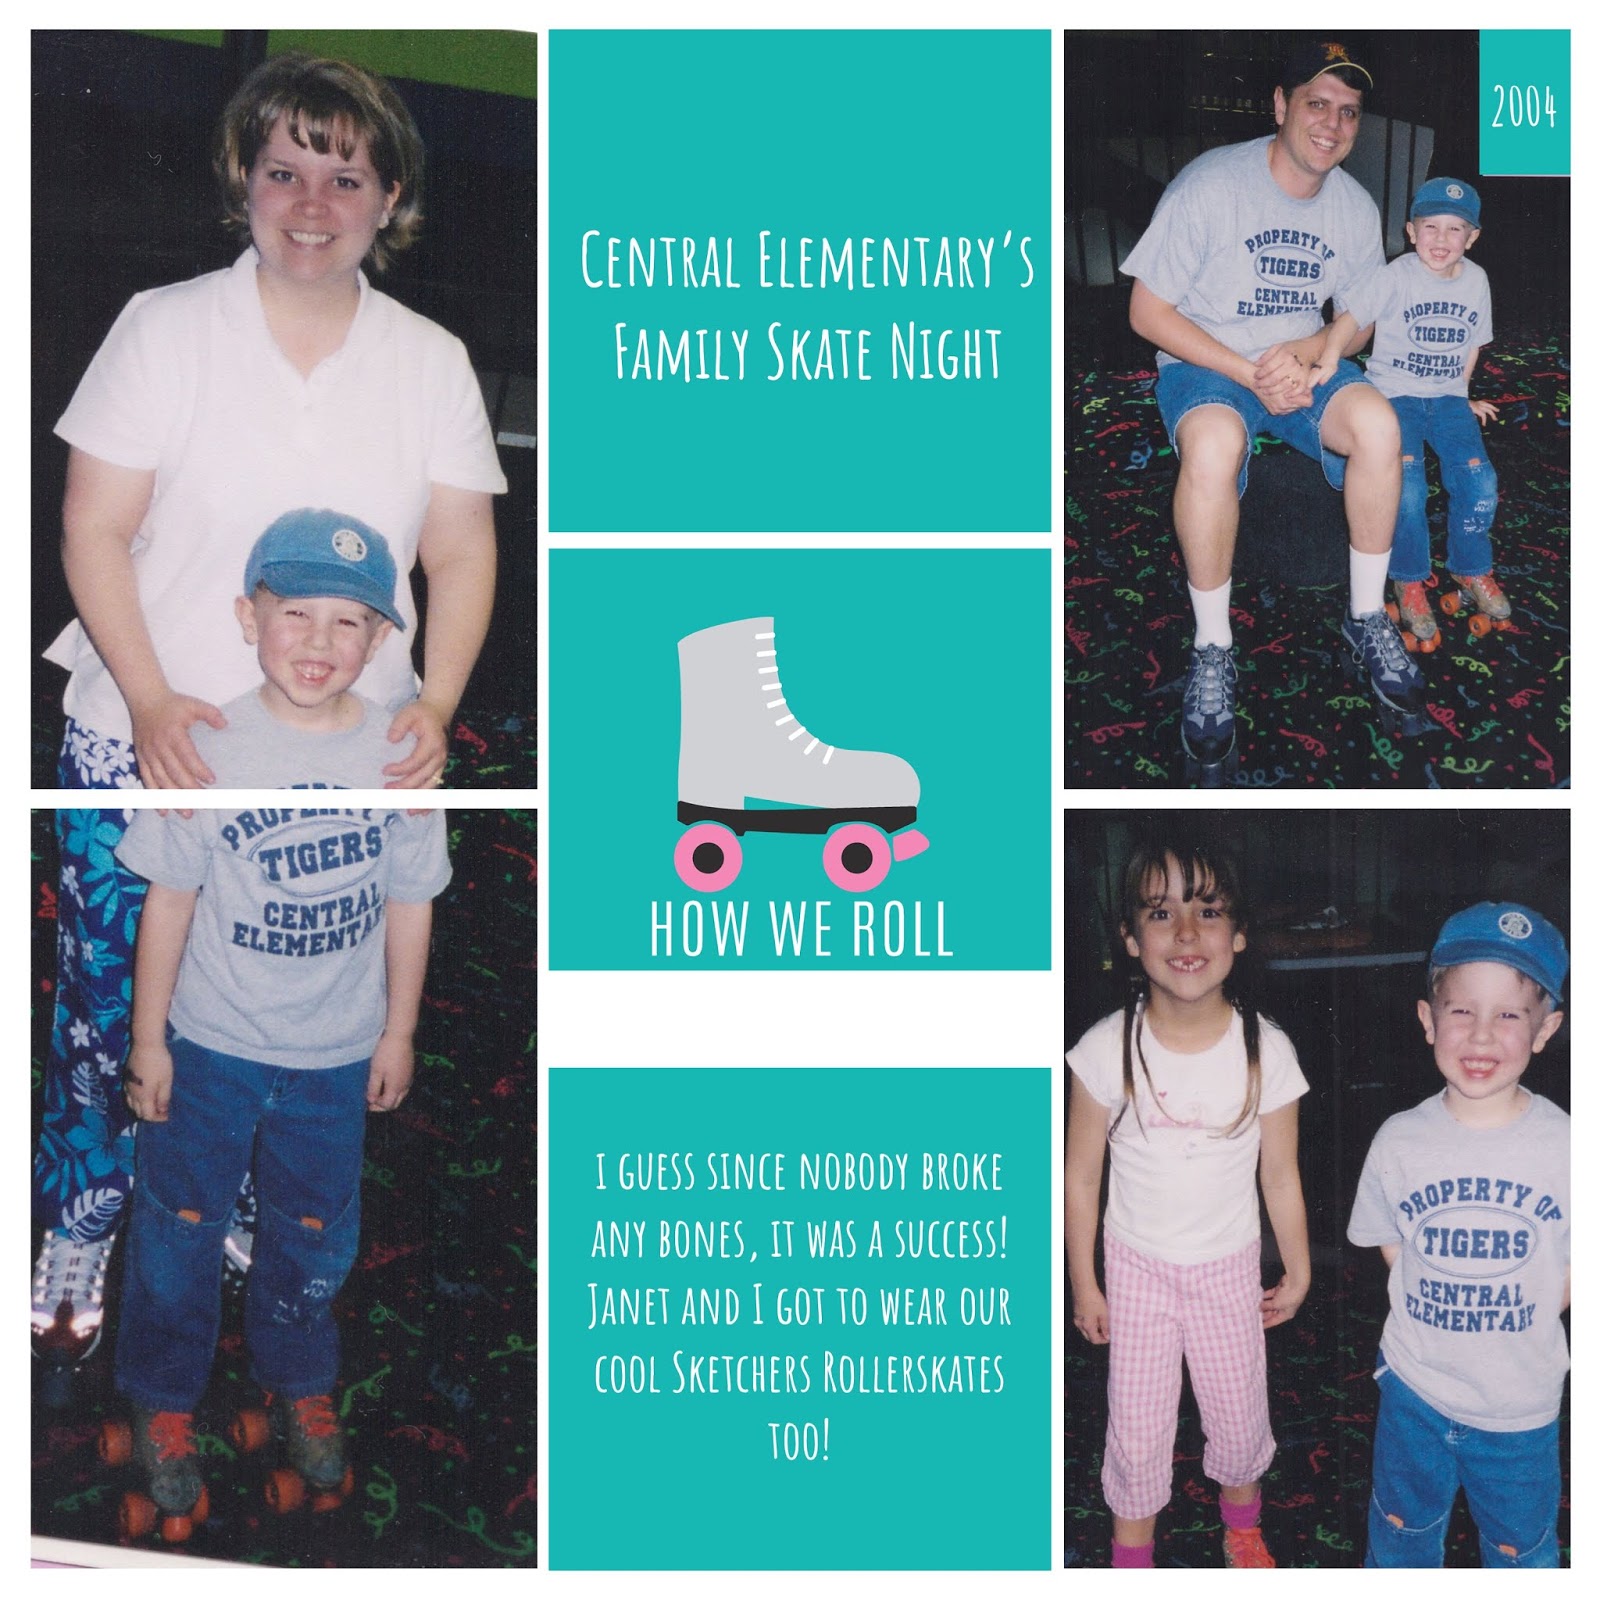 |
| That middle card is actually a title card, so had a white band for journaling on it. |
I added a Free Form Text box to that roller skate card, and typed a captial "I" in the Raleway font. Then I rotated it onto it's side ( so it was like this ___ ), and then enlarged it so that it covered the white band on the card. Then I changed the color of the font to the same teal color as the card, and effectively "masked" that white band!
Then I changed my background color to the same teal, and DONE!

Oh yeah, one more thing! If you look back at the original page, and the photo of my son and I, you can see that the other picture's cardstock matte is kind of intruding on the space above my son's head. Well, when I pulled that photo into the pocket, you could still see that cardstock corner of the other picture. So I used the same "I" trick and covered up that cardstock corner, and then added the 2004 text on top of that.
Now it's DONE! :)
No comments:
Post a Comment
Don't just be a lurker! Leave a comment!