
Because of copyright issues, there aren't any "official" Disney themed card kits available from Becky Higgins, but there are some still-generic-but-close-enough kits that work great.
Click on these links to be taken to the Card Reference pages on Becky Higgin's website, where you can see card examples from each of these kits:
- Character Magic Edition - lots of purples, greens, reds, and oranges, perfect for mermaid, pirate, dragon, princess type pages.
- Character Magic Edition Overlays - black and white overlays that coordinate with the above kit.
- Magic Memories Themed Cards - lots of reds, yellows, greens, light blues, classic Disney castle, dole whips, balloons type cards
- Magical Cruise Edition - this one is probably the least Disney-ish (in my opinion), but is still intended for a Disney Cruise-themed page. Reds, yellows, blue and nautical themed cards.


One additional thing that I've done on my PL app pages, is to incorporate emojis into my journaling or titles of my pages......with a twist.
There is a Bejeweled-like game app out there called Disney Emoji Blitz. But instead of jewels in the game, there are Disney character emojis! As you play the game, you earn different sets of not only character emojis, but other emojis as well--things like Disney food (churros, dole whips, mint juleps) ride vehicles (teacups, pirate ships, race cars), character costumes (Cinderella's glass slipper, Donald Duck's hat, mouse ear hats, Aladdin's lamp, etc.)
The thing about them is that you have to play the game to earn new sets of emoji. Finish a game task, and you'll earn 5-10 themed emojis at a time. Save coins and you can earn new character emojis. Usually about once a month there's a couple of themed challenges where you can earn a villain emoji (Ursula, Captain Hook, The Queen of Hearts, etc.)
These emojis are saved to an additional keyboard on your phone that you can access like you can emojis. But there's a catch. To use the emojis, they can't be added in with text like regular iPhone emoji's can. You have to copy and paste them as images into a text message and then send them like photos. And they can't be copied and pasted into the Project Life app directly, via a text box either.
They are so fun to use, but take a little work around to use them. So I thought I'd walk through the steps of how to use them on a Project Life page.
- Download the Disney Emoji Blitz App on your phone or tablet and play games to earn characters and emojis.
- Open your text messaging program and address a text message to yourself (or someone you want to send an emoji to).
- Switch to the Disney Emoji Blitz keyboard. I have an iPhone, so I just tap the gridded circle button like I do to get to my normal emojis, and then tap it again to access this additional keyboard.
- You'll see all of the Disney emoji's you've earned so far in the game, listed with characters first, and as you swipe right, other themed emoji (costumes, props, animals, scenery, etc.)
- Find the emoji you want to use on your page and tap it. (In this example I want to use a Captain Hook emoji). When you pick a character faces emojis, you'll actually get a little sub-menu of various "faces" you can choose from (mad, sad, heart eyes, sleeping, etc.).

Tap the variation you want to use and it get's placed in the "to be texted" box. This area probably has a proper name, but I don't know what that is!

- Then you'll tap the Copy button...

...and you'll see this message.
- Then you'll tap into your text message box and get the option to Paste your emoji there.
- Then you can send this emoji to yourself by tapping the blue send arrow.
- Once you've sent the emoji to yourself, tap the image and then choose the Upload button.
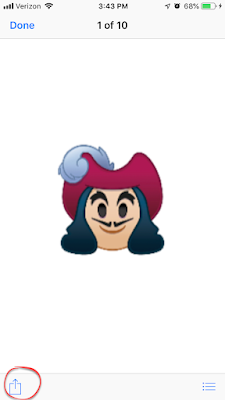
- Then you can either use the Save Image option to save the emoji to your camera roll, or the Copy to Project Life button to pull up your PL app, where you'll need to pic the pocket for the image!


The Copy to Project Life option is actually something I haven't seen before until I was writing this blog post! It's kind of a neat feature!!
You might get a low resolution warning when you put these emojis in your PL page pockets. Since they are meant to be used as small images, it's probably best to only use them in small pockets and not try to pinch and zoom on them too much. The pages I've printed using them haven't been overly pixelated, but if that is a concern, maybe only use them in true 2x2 pockets, like the ones in the example below!

It may seem like a lot of work, but using these little Disney enhancements on your page is kind of fun!
No comments:
Post a Comment
Don't just be a lurker! Leave a comment!