Let’s face it, when thinking about creating a digital scrapbook page there can be a lot of anxiety. Which photos and orientations will look best on the page? Which elements, papers, patterns, journal cards, etc. will I use? I’m not sure how to do all those fancy things in Photoshop that I see other scrapbookers doing. I want to do it digitally, but I don’t want it to be overly complicated!
You’re in luck! While I like to be “fancy” sometimes, I also like to keep things simple when I can! So for me, that comes in the form of what is commonly known in the industry as “pocket scrapbooking.” And for this type of scrapbooking, I prefer to use the Project Life app! It’s free for both Android and iPhone, and while I’m an iPhone user, the process of making pocket pages is similar on both platforms.
So, let me start of by showing you my finished pocket page:
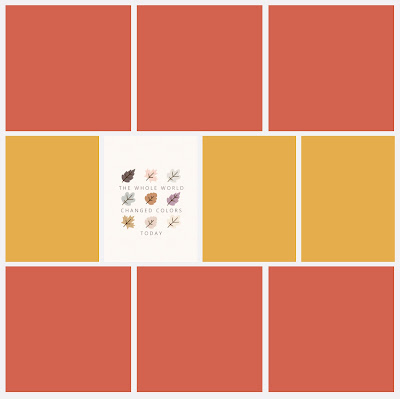
This page features journal cards, patterned paper, and solid color papers from the Humble & Create kit, A Good Day.
I started the page by selecting the Project Life app template that had the configuration of pockets that I wanted. In this case, it was Design K, which has three 4x4 pockets along the top and bottom of the page and a row of 3x4 pockets in the middle.
I started off by placing a journal card from the A Good Day kit into one of the 3x4 pockets. Now in the Project Life app, you have the option of adding either photos or Project Life app cards into each of the pockets. Since I wanted to use a Humble & Create kit rather than one of the Project Life kits, I have to bring that into the pocket as a photo.
Before I get into how I did that, let’s talk about digital kit storage for a second. When I purchase a digital kit from Humble & Create, I download all the bits and pieces (elements, papers, cards) to my computer first. Then I move them into Dropbox. Dropbox is a cool storage system that allows you to create folders and organize your digital files—and then access them from any device! That’s important because I like to make my pocket pages on my phone or iPad! I organize my Dropbox items first by designer, then by kit name, then by kit piece. For example: Humble & Create > A Good Day > Journal Cards.
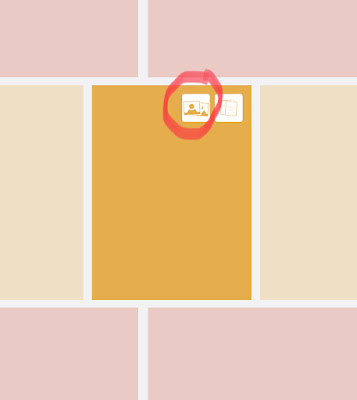
Ok, back to the page making! In the Project Life app, I tapped into the pocket where I wanted to add the card and selected the photo-picker icon.
From here I chose where to pull the photo from. Now I say “photo” even though I’m going to be pulling in a journal card. In the Project Life app, the way to pull in non-PL cards is to act as if they were a photo. One of the options to choose from was my Dropbox folders!
So, I selected the Dropbox option, navigated within Dropbox to find the card I wanted to use in the pocket…
…and tapped on it to bring it into the Project Life app pocket.
It was as easy as that! Then I repeated that same process to add additional cards and actual photos to the other pockets! But here’s the kicker! Just because the template’s pockets are designed for journal cards, doesn’t mean that you are limited to only using “cards”. You can pull in patterned or solid papers into the pockets as well!
That’s what I did in the picture below. I pulled in patterned papers from that same A Good Day kit and used them in the 4x4 pockets along the top and bottom of the page! You can even pinch and zoom once you’ve added your papers to the pockets to enlarge the design to fit your preference. The top left pocket is how the full 12x12 patterned paper looks when you first add it to a pocket, and I wanted to see the leaf detail, so I pinched and zoomed to get the look of the other “leaf paper” pockets!
So, I filled in all my pockets with either actual photos or digital papers and journal cards from Humble & Create. Now what? Am I done? Sure, I very well could be, but there’s a couple things I want to show you that you can do within the Project Life app to be just a little bit “fancy.” 😊
First, I took my completed page and used the Export button to export my page and save it to my device as a 12x12 photo.
Then I started a new page within the Project Life app, and selected the Big Shot 16 template, which has a large photo pocket on the top and four 3x4 pockets along the bottom:
Then I used the photo-picker option within the big pocket to pull in my whole finished page from earlier.
Now obviously, my finished page I brought into that pocket was 12x12 and that is bigger than the pocket is, so the top and bottom of my page are cut off. That’s totally fine, and actually something that I had thought out ahead of time!
I wanted to tilt that top photo so it sat at a slant within the pocket! To do that, I used an add-on feature within the Project Life app called Pic-Tap-Go. This feature costs a few extra dollars but is so worth it for the features is provides. We won’t go into them all here, but you can add filters to photos as well as have some cropping features as well.
To access Pic-Tap-Go within the Project Life app, I tapped on my photo to bring up the Editing button.
I tapped on that and then tapped the Pic-Tap-Go icon, which launches Pic-Tap-Go.
From within Pic-Tap-Go, I tapped the Crop icon at the bottom of the window.
That brought up some controls along the bottom of the window. Like I said, there are lots of things you can do here, but I just focused on the Tilt feature.
Once I pressed that icon, I got a slider bar that I used to adjust the angle of the tilt on my photo. One thing to watch for here, is that when you adjust the tilt angle, your photo will automatically enlarge, so just
keep an eye on which parts of your photo will be cut off (expand outside your page boundaries).
When I was done tilting, I pressed the checkmark button in the bottom corner…
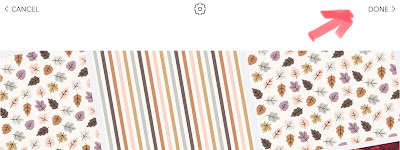
…and then tapped DONE > in the top corner to return to the Project Life app.
Now I had my tilted photo within that top pocket! Pretty fancy, eh?
Now for the finishing touches! I used the steps outlined above to bring in solid papers from the A Good Day kit into the four remaining pockets along the bottom.
Finally, I added a single letter into each of the bottom pockets using another add-on feature within the Project Life app called Free Form Text (FFT). This feature allows you create text boxes over your photos (or in this case, digital papers).
So there you have it! A fancy-but-simple pocket page using Humble & Create products, all within the Project Life app!


